Last updated November 18, 2026








Free written scope consultation - allowances, timeline, and change-order rules on paper before a single trade is scheduled
Bathroom Remodeling Troubleshooting: Common Problems and How to Fix Them
Replacing grout in a bathroom that smells musty is the construction equivalent of painting over rust. The smell is mold, the mold is moisture, and the moisture means your waterproofing failed, not your grout. In our experience across Anaheim, the vast majority of “cosmetic” bathroom problems homeowners call us about – cracked grout lines, tiles that pop loose underfoot, a soft spot by the shower curb, paint peeling above the tile – trace back to the same root cause: a substrate or waterproofing failure hiding beneath the surface. Treat the tile and you’ll see the same failure again within two years. This guide teaches you to diagnose the actual failure so your repair holds.
Quick Answer
Most bathroom remodel problems that look cosmetic are symptoms of waterproofing or substrate failure underneath. Fix the surface without diagnosing the cause and the problem returns within 12 to 24 months. The right fix depends on the failure pattern: cracked grout from thermal movement needs movement accommodation, efflorescence needs moisture control at the source, and a soft floor or musty smell means the shower pan or wall substrate has failed and needs to be opened up, dried, and rebuilt with proper waterproofing before anything goes back on top.
Styles & brands we work with
- Kitchen remodeling
- Bathroom remodeling
- Home additions & ADU
- Roofing
- Windows & doors
- Driveway & pavers
- Fence
Table of Contents
- The Diagnostic Framework: Work Backward From the Symptom
- Thermal-Cycle Tile Cracking in Southern California Bathrooms
- Efflorescence and Hard Water Staining: Reading the White Powder
- Shower Pan Failures at the Curb Transition
- DIY vs. Pro: When to Regrout and When to Open the Wall
- When Problems Appear After a Remodel: A Timeline
- “It Was Fine Until the Contractor Left”: Defect, Settling, or Maintenance?
- Reading Moisture Signals Before They Become Mold
The Diagnostic Framework: Work Backward From the Symptom
The fastest way to solve a bathroom problem is to stop looking at the surface and start working backward. Every visible symptom you can name points to a specific failure layer – tile, thinset, substrate, waterproofing, plumbing rough-in, or ventilation. Once you know which layer is failing, the repair scope becomes obvious. Here’s the framework we walk Anaheim homeowners through on nearly every troubleshooting visit.
Step 1: Describe the symptom in one sentence
“The grout in the shower cracks every few months.” “The floor tile near the toilet feels spongy.” “There’s a white crust along the bottom row of wall tile.” The more specific the symptom, the faster the diagnosis. Vague complaints (“the bathroom feels wet”) are the hardest to troubleshoot because they can come from three different root causes.
Step 2: Match the symptom to the failure layer
- Cracks following the grout lines, all the way through the tile – movement in the substrate, either from thermal cycling or from deflection in the floor framing.
- Hairline cracks in the grout only, tile intact – grout shrinkage or minor movement. Often cosmetic, but check for moisture first.
- White, chalky powder on grout or tile – efflorescence, meaning water is traveling through the assembly and depositing mineral salts on the way out.
- Soft or spongy floor – moisture has reached the substrate. In Anaheim’s older tract homes, this is often a failed pan liner or a wax ring leaking under the toilet for a year before anyone noticed.
- Musty smell that doesn’t go away after cleaning – active mold growth, almost always inside a wall cavity or under the floor.
- Paint peeling above the tile line, on drywall – steam reaching drywall that should never have been in a wet zone. Ventilation or waterproofing failure.
- Tiles popping off the wall – thinset bond failure, usually from moisture behind the tile or from thinset applied over a surface that wasn’t properly prepared.
Step 3: Test before you tear
Before opening anything, we run three quick tests. A moisture meter on the drywall near the shower tells us if the wall cavity is wet. A 24-hour shower-pan water test (plug the drain, fill the pan with an inch of water, wait) reveals whether the pan liner is intact. A visual inspection of the caulk joint where wall meets floor shows whether water has been wicking behind the tile for months. These three tests narrow the repair scope dramatically, which is why a proper diagnosis often saves a homeowner thousands versus the “just replace the whole bathroom” quote they got from someone else.
The best bathroom troubleshooting is detective work, not demolition. Once you know which layer failed, the fix is usually smaller than you feared.
Thermal-Cycle Tile Cracking in Southern California Bathrooms
Anaheim has a unique thermal profile for tile: hot afternoon sun on exterior bathroom walls, cool evenings, and a shower spraying 105-degree water against a wall that might be 60 degrees on a January morning. That daily swing expands and contracts every material in the wall assembly at a slightly different rate. Tile doesn’t crack because tile is weak – it cracks because something behind it moved and the tile had nowhere to go.
In Anaheim specifically, we see thermal-cycle cracking concentrated on walls that face west or south, where the exterior surface gets hottest in the afternoon. Homeowners in the Colony District and along the older streets near downtown Anaheim call us about wall tile that cracks every spring, gets regrouted, and cracks again by August. The regrout is treating the symptom.
What thermal-cycle failure actually looks like
- Cracks that run vertically, following the same grout line repeatedly
- Cracks that appear or widen seasonally (worse in late summer, better in winter)
- Tiles that sound hollow when tapped – losing bond but not yet detached
- Hairline cracks radiating from the center of a tile
The fix that holds
- Confirm the cause. Tap-test tile around the crack. Hollow tiles near the crack tell you the bond is failing, not just the grout.
- Address movement at the source. If the wall assembly is sensitive to thermal swings, the tile layer needs a crack-isolation membrane or a more forgiving thinset. Neither is something you can install through a grout joint.
- Rebuild the affected section. In most thermal-cracking cases, that means removing the cracked tiles, inspecting the substrate for moisture and movement, then reinstalling with proper isolation.
- Use flexible sealant at movement joints. Corners and wall-to-floor transitions should be caulk, not grout. This is one of the most common installation errors we correct.
If you’re noticing this pattern in your Anaheim bathroom, it’s not the tile’s fault. Start with a free estimate so we can identify whether movement is coming from the substrate, the framing, or the exterior envelope. Our technicians have up to 12 years of experience diagnosing exactly this kind of seasonal failure. Groundwork Construction Co. of Anaheim home is where a conversation about your specific bathroom begins.
Efflorescence and Hard Water Staining: Reading the White Powder
Efflorescence – the white, chalky powder that appears on grout or tile – is the most misdiagnosed bathroom problem we see. Homeowners call it “hard water staining” and reach for a stronger cleaner. Efflorescence isn’t a mineral deposit from the water on the surface; it’s salt that traveled through the tile assembly from behind and dried on the face. If you’re removing it with a scrub brush every few weeks, the source is still active.
In Anaheim, hard water runs 8 to 12 grains per gallon depending on the neighborhood, which is part of why efflorescence is so common here. Water migrating through grout joints or failed sealant picks up mineral content from the mortar bed, then evaporates on the tile face and leaves the mineral behind. But hard water alone doesn’t cause efflorescence; it causes scale. Efflorescence means water is entering the assembly from somewhere – not just touching it.
How to tell efflorescence from scale
- Efflorescence is powdery, fluffy, and wipes off easily. It regrows.
- Scale is hard, crusty, and requires a light acid to dissolve.
- Efflorescence is worse after a rain or heavy shower use.
- Efflorescence often concentrates along the bottom rows of shower tile, near the curb, or low on exterior wall sections.
Where the moisture usually comes from
- Failed sealant joints at the shower curb, corner, or wall-to-floor transition. Water enters through cracked caulk, travels behind the tile, and exits through the grout face.
- Missing or damaged waterproofing on the back of the shower wall. This is the big one, and it’s an installation defect, not a maintenance issue.
- Plumbing leaks inside the wall (a slow drip at a shower valve or supply line), which build up behind the wall until the assembly is saturated.
- Grout porosity in a shower that has never been sealed. A properly waterproofed shower shouldn’t care, but showers built without proper membrane do.
If the white powder keeps returning after cleaning, don’t just clean it again. Call (888) 300-3178 for a free estimate and let us trace where the water is coming from. The repair is often limited to resealing and spot-repairing a failed joint – not rebuilding the whole bathroom – but only if we catch it before the substrate deteriorates.
Shower Pan Failures at the Curb Transition
The single most common structural failure we see in Anaheim bathrooms is the shower pan, specifically at the curb. The curb is the raised threshold you step over to enter the shower. It’s also the hardest part of the shower to waterproof correctly, and the point where water reaches the subfloor first when the pan liner fails.
Why the curb is the weak point
A proper shower pan has a pre-slope under the liner, a sloped liner, a second mortar bed on top, and a waterproofing layer that ties into the walls. That’s four layers of careful work. If any of them is wrong – the pre-slope is flat, the liner has a nail through it, the curb was built with green board and no membrane, the corner dams are missing – water penetrates and sits against the wood framing instead of draining. Anaheim’s older homes (a lot of them built in the 1960s through the 1980s) often have original pans that were built to older standards and have been slowly failing for a decade.
The symptoms of a failing shower pan
- Soft, spongy floor just outside the shower door
- Loose tile or lift near the curb (tile lifting away from the floor)
- Musty smell that doesn’t clear with ventilation
- Cracked or missing grout at the shower curb, recurring
- Water stains on the ceiling below the bathroom – the telltale sign water has been traveling for months
- Shifting or crumbling curb tile
Any of these on their own warrants a proper assessment. Two or more together almost always means the pan liner has failed and the subfloor needs to be inspected before anything else is planned. A shower pan that’s failing at the curb cannot be fixed from above; the tile, mortar, and liner have to come out, the subfloor dried and sistered if needed, and the pan rebuilt.
This is where hiring the wrong contractor compounds the problem. Rebuilding a shower pan is not the place for the lowest bid. When we rebuild one, we use a waterproofing system with a written manufacturer warranty and back the installation with our 730-Day Done Right Promise – if it’s not done right, we make it right. Home Additions & ADU in Anaheim goes into the same substrate discipline we apply on bigger builds, because the physics don’t change with scale.
DIY vs. Pro: When to Regrout and When to Open the Wall
The most expensive mistake in bathroom troubleshooting is doing the DIY repair when the problem is structural – or paying a pro for a repair you could have done with a tube of caulk and a Saturday morning. Here’s where we draw the line, based on more than a decade of “I tried to fix it myself and now it’s worse” calls.
Safe DIY repairs
- Recaulking the shower joints – the curb-to-wall and wall-to-floor seams. Remove old caulk completely, clean with denatured alcohol, dry 24 hours, apply a bathroom-rated 100% silicone. This is genuine maintenance and it matters.
- Regrouting a cosmetic crack that doesn’t extend through the tile and hasn’t recurred after the previous repair. Match the grout, use a latex additive, seal after curing.
- Fixture adjustments – a showerhead running at low pressure, a loose handle, a toilet running. Those are plumbing trim, not failure.
- Cleaning efflorescence – a mild acid cleaner (diluted vinegar or a bathroom-specific descaler) will remove the visible deposit. Just don’t mistake this for the cure.
- Ventilation fixes – replacing the bath fan, or upgrading it to a properly sized CFM unit. In Anaheim, a 50-CFM fan in an 80-square-foot bathroom is undersized and part of why moisture stays.
Repairs that need a professional
- Any soft floor anywhere in the bathroom – under tile, in the shower, around the toilet. Subfloor damage means opening the floor.
- Musty smell that returns within a week of a deep clean. Mold is active and it’s inside a wall.
- Tiles popping off a wall – the bond has failed and re-setting tiles onto the same substrate will fail again.
- Shower pan failure – water managed at the surface has reached the subfloor. Open it up.
- Water staining below the bathroom – this is plumbing or waterproofing, not maintenance.
- Floor framing damage – if you pull a tile and see soft wood, stop. Structural repairs need a professional eye.
Here’s the honest rule: if the underlying substrate is wet, no surface fix will hold. Grout, caulk, and sealant are designed to keep a dry assembly dry – not to dry out a wet one. If you’re not sure which category you’re in, the diagnosis is worth the call. The estimate is free.
When Problems Appear After a Remodel: A Timeline
One of the most useful things we can give homeowners is a timeline. When a bathroom problem shows up after a remodel, the calendar tells you a lot about whether it’s an installation defect, normal settling, or a maintenance failure on your end. Here’s what to expect – and what should ring an alarm bell.
Immediate (0 to 30 days)
Problems in the first 30 days are almost always installation defects. A shower that leaks from day one, a floor tile that’s already lifting, a toilet that rocks, a grout joint that’s already cracked – none of that is normal. Call the installing contractor. The 730-Day Done Right Promise on our work exists exactly for this window; if the install was wrong, we fix it. Full stop.
The 30-day to 6-month window
Small hairline cracks at corners or wall-to-floor transitions can appear here as the assembly dries and settles. Corner cracks should be caulk, not grout, so if a corner cracked in six months, the seam was grouted wrong. Efflorescence starting to appear here means water is already in the assembly – not settling. A musty smell in this window is a red flag, not a wait-and-see.
6 to 24 months
If your shower tile cracks seasonally after the first summer, that’s thermal movement that should have been addressed at install with a crack-isolation membrane. A soft spot by the curb that shows up in year two is a pan liner failure – the water has been traveling for a year before the surface showed it. Recurring efflorescence at 12 to 24 months, with no other symptoms, often points to a failing caulk joint that’s letting water in.
The 24-month mark and beyond
This is where the calendar helps you decide whether to push back on the contractor or hire a diagnostic visit. A two-year-old failure at the curb is well past any reasonable settling window; it’s a failure. A two-year-old grout crack that’s cosmetic is a maintenance issue. That line isn’t arbitrary – it lines up with the two-year mark because that’s roughly how long a slow waterproofing failure takes to surface.
Our 730-Day Done Right Promise runs two full years from project completion – a deliberately longer window than most contractors offer, because we think the failure mode should tell you who’s responsible, not the fine print.
“It Was Fine Until the Contractor Left”: Defect, Settling, or Maintenance?
Almost every homeowner we visit for a second opinion has said some version of this: “It was fine the day he left.” Here’s how we sort genuine installation defects from normal settling from things that were always going to be your responsibility.
Installation defects
- Water pooling in the shower pan or against the curb
- A shower that smells musty within 60 days of completion
- Cracked tile in a straight line repeating within 6 months
- Loose or hollow-sounding floor tile within a year
- Grout cracking at a corner that was grouted instead of caulked
- Any leak showing up below the bathroom
- Peeling paint on the bathroom ceiling within a year, when the fan is running
These all point to something that was missed or done incorrectly at install. They belong in a warranty call, not a “we’ll live with it” pile.
Normal settling
Small hairline cracks in the first 60 to 90 days along grout lines – especially in new construction or fresh drywall – are common and usually cosmetic. Wood framing dries and shrinks slightly, and the tile layer moves with it. If they stop and stay stopped, no action needed beyond a cosmetic regrout. If they keep widening, the movement is active.
Homeowner maintenance
Some failures are yours to prevent. Caulk seams need to be redone every 3 to 5 years – it’s the single most important thing a homeowner can do in a bathroom. A bath fan that’s never cleaned or an undersized fan that runs for 2 minutes after a shower will steam a bathroom that was built perfectly. Anaheim’s dry climate helps, but a humid bathroom that never vents will fail regardless of how well it was built.
The clean test: if the same problem would happen in a perfectly built bathroom under the same use, it’s maintenance. If the problem can only happen because of how it was built, it’s a defect. Fence Installation in Anaheim gets the same honest sorting, because half of our Anaheim clients have been through this once already on some other project, and they call us because we say what’s actually wrong.
Reading Moisture Signals Before They Become Mold
The gap between “there’s a problem” and “there’s a mold problem” is usually 6 to 12 months. If you catch the signals in that window, the repair is smaller. If you wait, the repair includes remediation. Here’s what actually moves fast.
- White haze on the bathroom ceiling near the shower – early mildew, and ventilation is the cause. Fix the fan, clean the surface, and it’s a 15-minute story.
- Darker musty smell that clears with the door open – borderline. Get a moisture meter on the wall behind that shower.
- Peeling paint above the tile line – paint doesn’t peel on dry drywall. This means the wall is wet behind the paint. Stop here and diagnose.
- Black or dark streaks in grout or caulk – active mold growing on organic material. Grout is not organic; if it’s growing there, the mold is behind it.
- Soft drywall around the shower valve – a slow valve leak behind the wall. Usually small, but the sooner it’s caught, the smaller the repair.
- Musty smell in the room next to the bathroom – the failure has been traveling. This is a professional call.
Anaheim’s climate is actually on your side here – our dry air evaporates surface moisture quickly, which means surface mold rarely gets a foothold. But that same dry air hides internal moisture: the wall cavity can be saturated while the surface feels bone dry. That’s why meters matter more than eyes in troubleshooting.
Common Mistakes to Avoid
- Replacing grout in a bathroom that smells musty. Grout isn’t the problem – waterproofing is. New grout over a failing substrate will look worse than the old grout within a year. In Anaheim, this is the most common “I already tried that” repair we hear.
- Cleaning efflorescence with stronger and stronger chemicals. The white powder keeps returning because you’re removing the symptom. The water source is still active, and acid cleaners accelerate substrate damage over time.
- Grouting corner joints instead of caulking them. Grout is rigid. Corners move. Grout cracks in corners 100% of the time because it’s the wrong material for the seam. It’s a 20-minute fix that catches almost every “my corner is cracking” call.
- Assuming a soft floor will “settle down.” A soft spot in bathroom flooring is damp wood. It’s not going to harden back up. Every day it waits, the subfloor repair gets larger, and mold has another start date.
- Running an undersized fan. A 50-CFM fan in an 80-square-foot bath won’t clear the steam. Anaheim bathrooms remodeled in the 1990s often still have the original fan, well past its effective life. That’s a $150 fix that prevents thousands in moisture damage.
- Trusting a “good deal” on a shower pan rebuild. The pan is the one place a trimmed bid becomes a two-year disaster. The four layers under the curb don’t tolerate shortcuts, and the failure signature is a slow leak into the room below.
- Painting over peeling bathroom paint without finding the moisture source. If paint peeled once, it will peel again in 6 months unless the wall behind it is dry. Fix the source, then the paint.
Most of these mistakes come from diagnosing the surface instead of the cause. That’s understandable – the surface is what you can see – but it’s why we start every free estimate with a moisture meter and a shower-pan water test, not a tile count.
See the difference
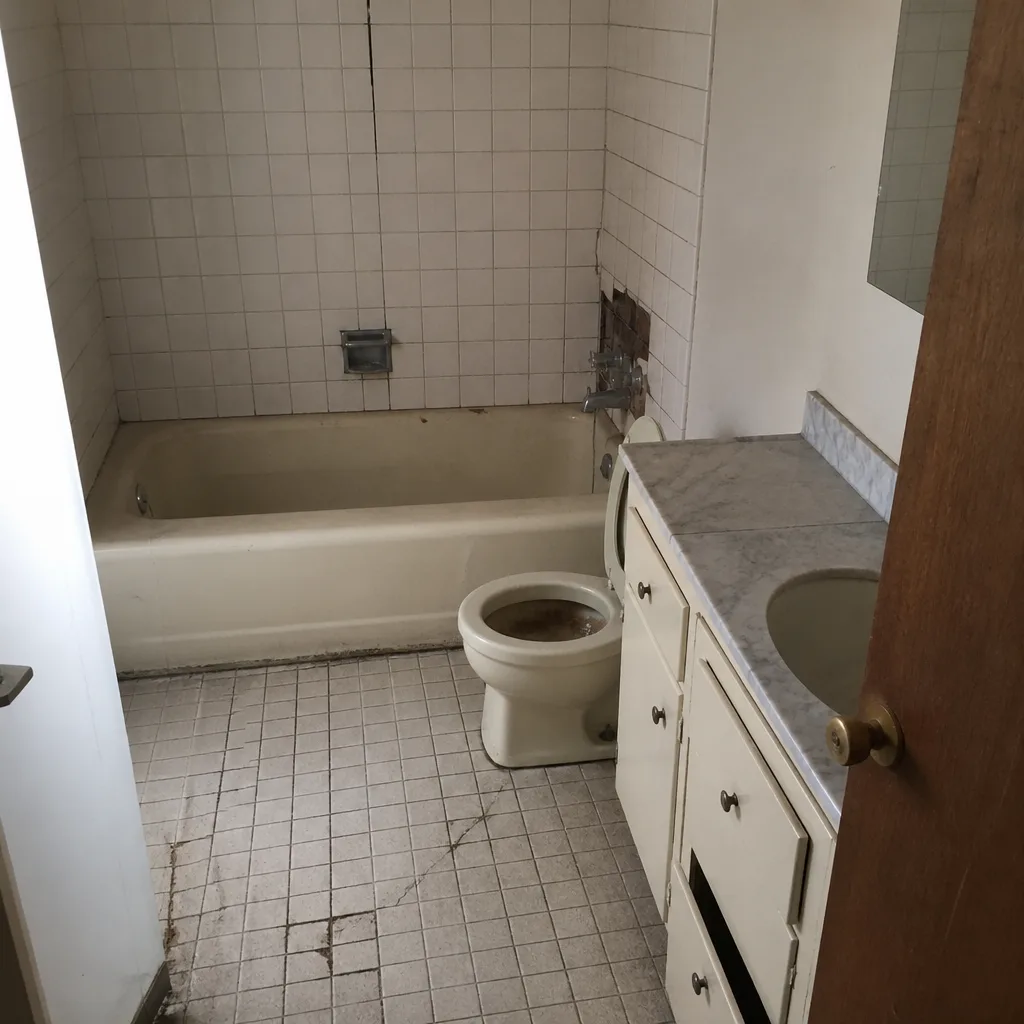 Before
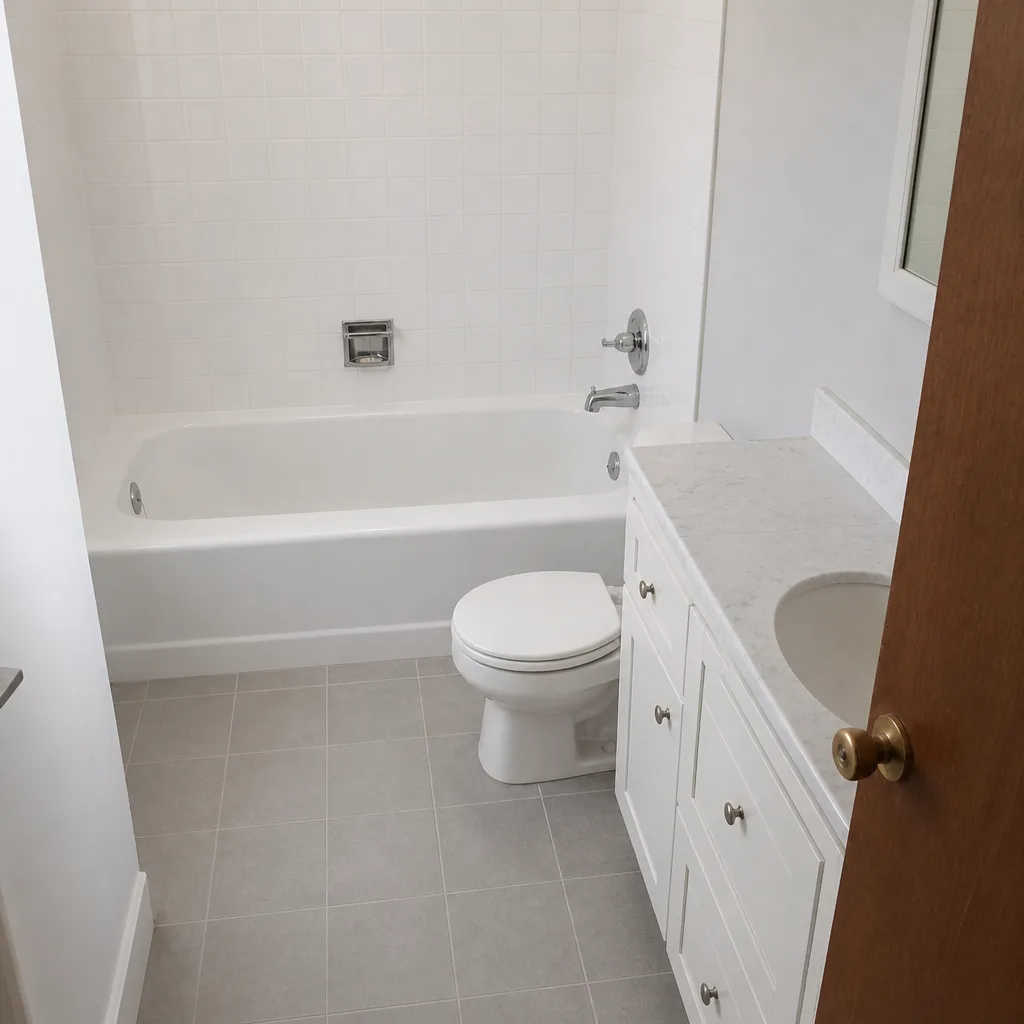 After
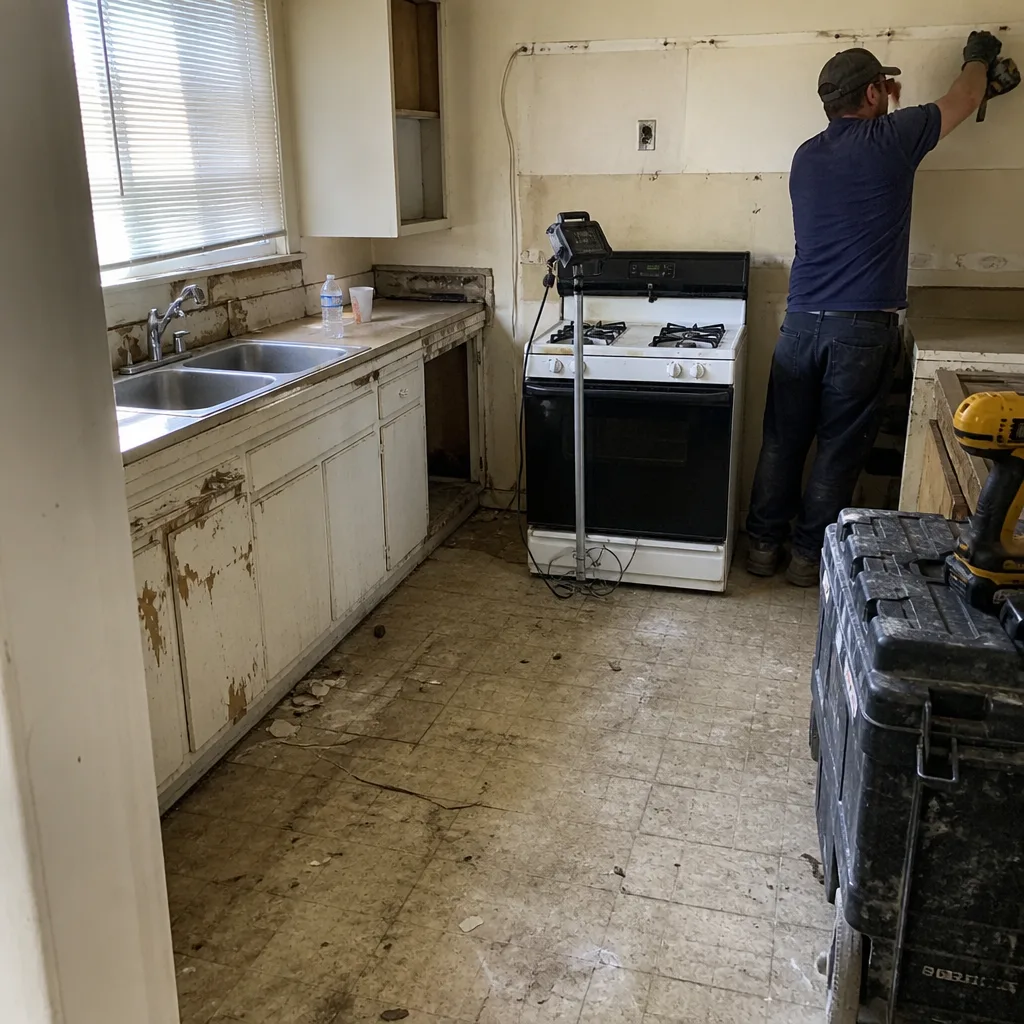 Before
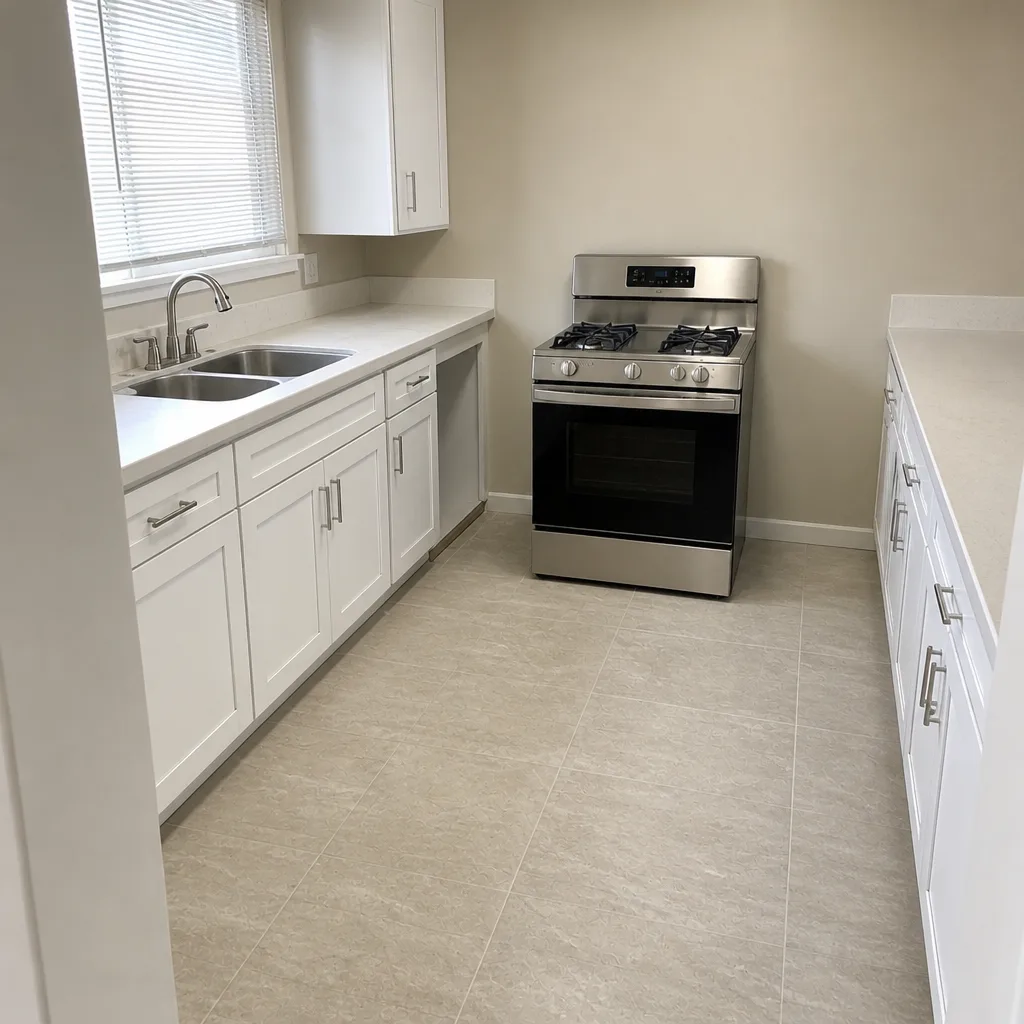 After
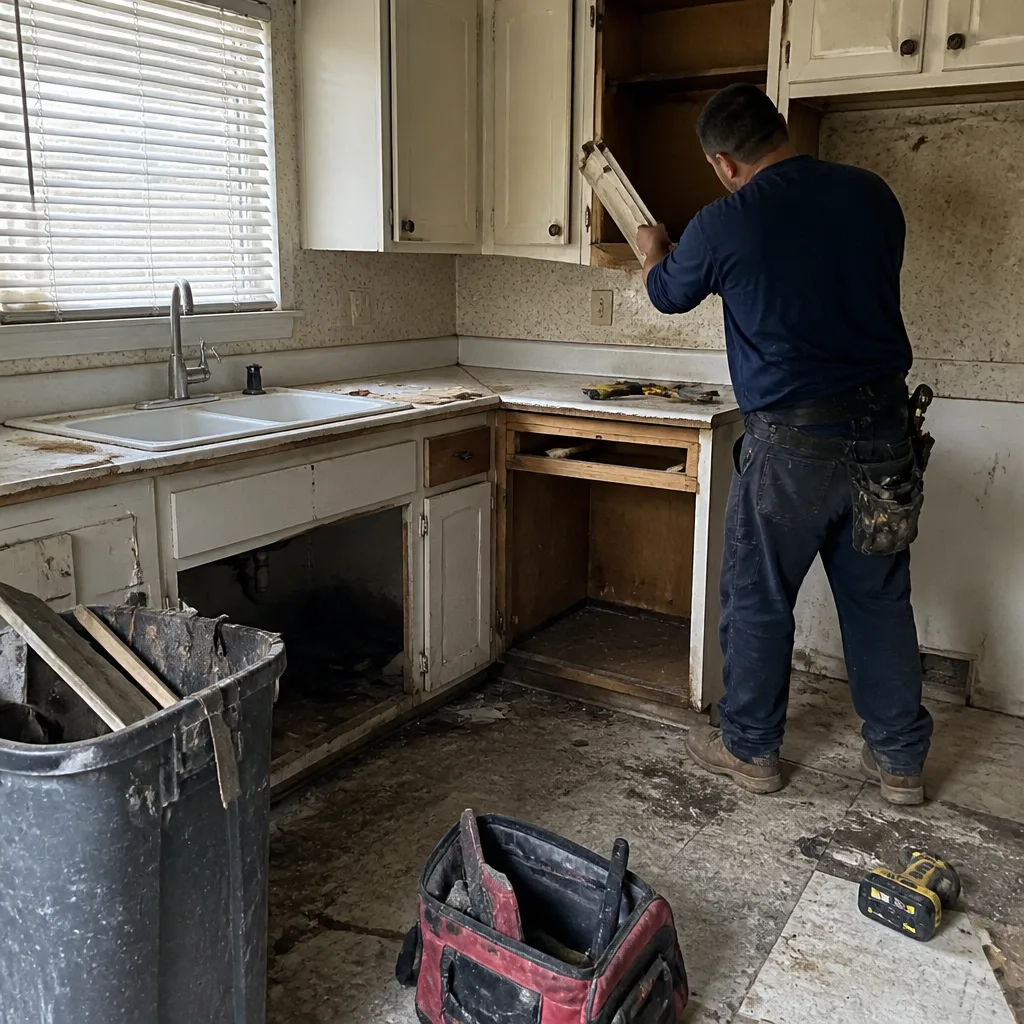 Before
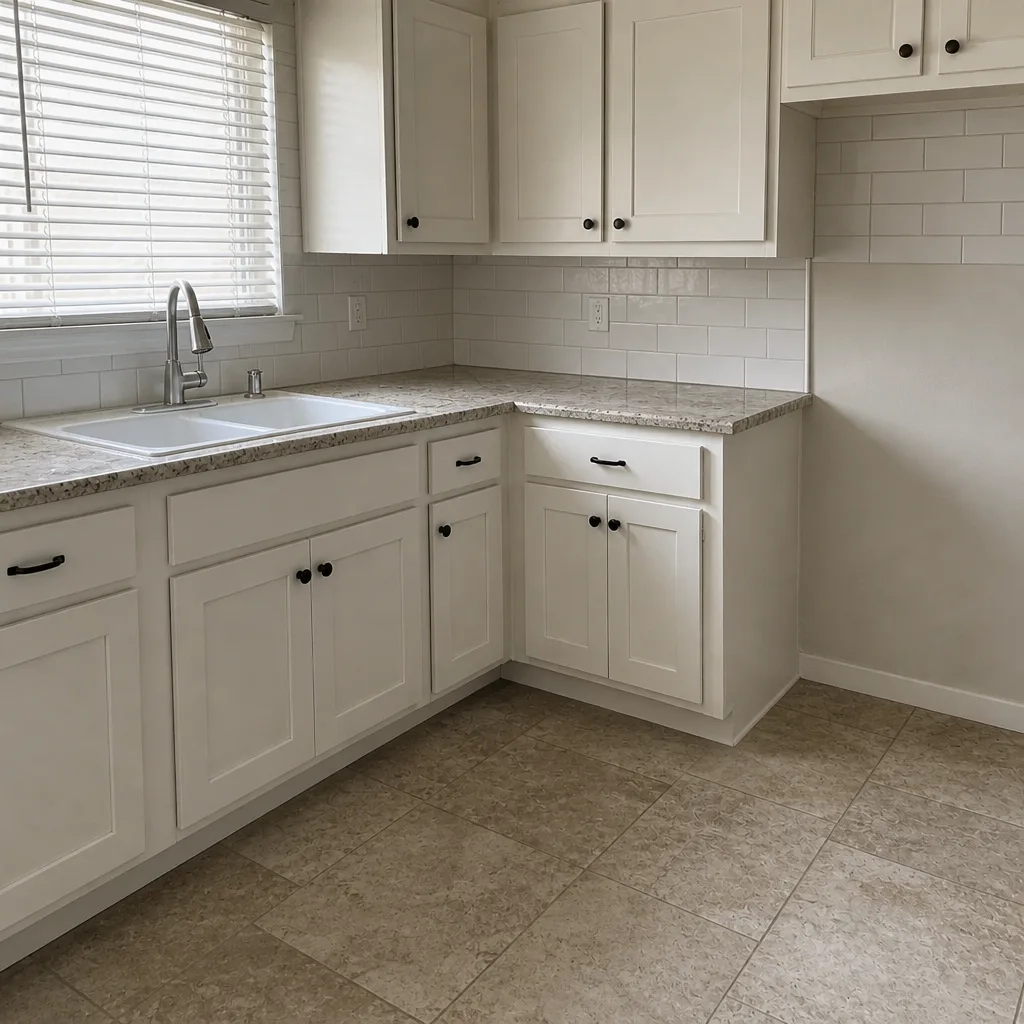 After
When to Call a Professional
Call a professional if any of these are true: the floor anywhere in the bathroom feels soft; the shower smells musty within a week of cleaning; water stains show on the ceiling below the bathroom; tiles are popping off a wall; efflorescence returns within a month of cleaning; or any problem you already “fixed” has come back in the same place. Those are all signals the failure is underneath the surface, and a surface repair is wasted money. You can safely handle recaulking, fixture adjustments, cosmetic regrouting, fan replacement, and cleaning – the rest is diagnosis-and-repair territory that benefits from a proper scope and a written warranty. Groundwork Construction Co. of Anaheim offers free estimates in Anaheim – call (888) 300-3178. We’ll bring a moisture meter, run a proper shower-pan test, and tell you honestly whether you’re looking at a $200 caulk-and-regrout or a shower rebuild.
Frequently Asked Questions
A shower pan rebuild in Anaheim typically runs $1,800 to $4,500 depending on the shower size, whether the subfloor needs replacement, and whether tile is replaced at the same time. If the subfloor below is sound and only the pan is rebuilt, most Anaheim projects land closer to the lower end. If you’re seeing water stains below the bathroom, add subfloor repair to that range. Call (888) 300-3178 for an exact quote – estimates are free and we’ll categorize the fix before you commit.
No. Hairline grout cracks in the first 60 to 90 days after installation are usually normal settling and stop on their own. Grout cracks that recur in the same place, that extend all the way through a tile, or that are combined with a musty smell or soft floor – those are usually waterproofing or substrate failures. The pattern matters more than the crack itself.
No, and this is the costliest troubleshooting mistake we see. Regrouting a musty bathroom is the construction equivalent of painting over rust – it hides the surface for a few months while the waterproofing continues to fail underneath. The musty smell is mold, mold requires moisture, and moisture means the waterproofing or substrate is compromised. Grout replacement should follow diagnosis, not replace it.
Seasonal cracking that returns in the same place is almost always thermal movement. Anaheim bathrooms get a big daily temperature swing on exterior walls, and a tile assembly installed without a crack-isolation membrane or movement joints cracks in the same line every summer. Regrouting fixes it for one season. A proper fix addresses the movement behind the tile.
The white powder is likely efflorescence – mineral salts that traveled through the tile assembly from behind and dried on the face. It’s not a hard-water deposit on the surface, which is why cleaning doesn’t stop it from returning. Efflorescence means water is entering the assembly somewhere, most often through a failed caulk joint or a missing waterproofing layer. The fix is finding and stopping the water source.
Timing and pattern settle most of these. Problems in the first 30 days are almost always installation defects – call the contractor. Small corner cracks in the first 60 to 90 days are normal settling. A recurring musty smell, a soft floor, water staining below the bathroom, or tiles lifting off a wall are installation defects regardless of how long it’s been, because those failure modes can only happen from how it was built. Caulk seams needing to be redone every few years is homeowner maintenance – that’s on you, and worth staying on top of.
The Bottom Line
If you take one thing from this guide, take the diagnostic habit: when something in your bathroom breaks, resist the urge to fix the visible layer. Cracked grout, efflorescence, musty smells, soft floors, and peeling paint are all surface signals of a specific failure underneath, and each one points to a different layer – tile, thinset, waterproofing, or substrate. Diagnose the layer, fix the layer, and the repair holds. Treat the surface, and you’ll be back here in two years. When you’re not sure which layer you’re looking at, that’s the point to call. Groundwork Construction Co. of Anaheim offers free estimates in Anaheim – call (888) 300-3178 for a proper diagnostic visit before you spend another dollar on the wrong repair. The estimate costs nothing. A second failed grout job costs a lot.
Written by the team at Groundwork Construction Co. of Anaheim.